Showing posts with label Scorpio. Show all posts

Sunday, April 20, 2014

3 Updos With Just a Pair of Back Braids


Sometimes the things that look the most complicated are actually the simplest to do. I found that out the easy way when I got bored earlier today. Before I go on, I might add that I did both the hair and this post while watching an episode of AMC's Breaking Bad, so if I seem to be leaving out some ridiculously simple step or if the braids seem wonky you can blame that on the distraction that comes from watching a bunch of people pretend to be a completely different bunch of people who make crystal meth. Anyway, all disclaimers aside, I'll just get right to it.

You will need:
  • Two mini hair elastics, preferably clear or close to your hair colour
  • A bunch of bobby pins
  • A couple of twist pins (optional)
  • Hairspray (optional)


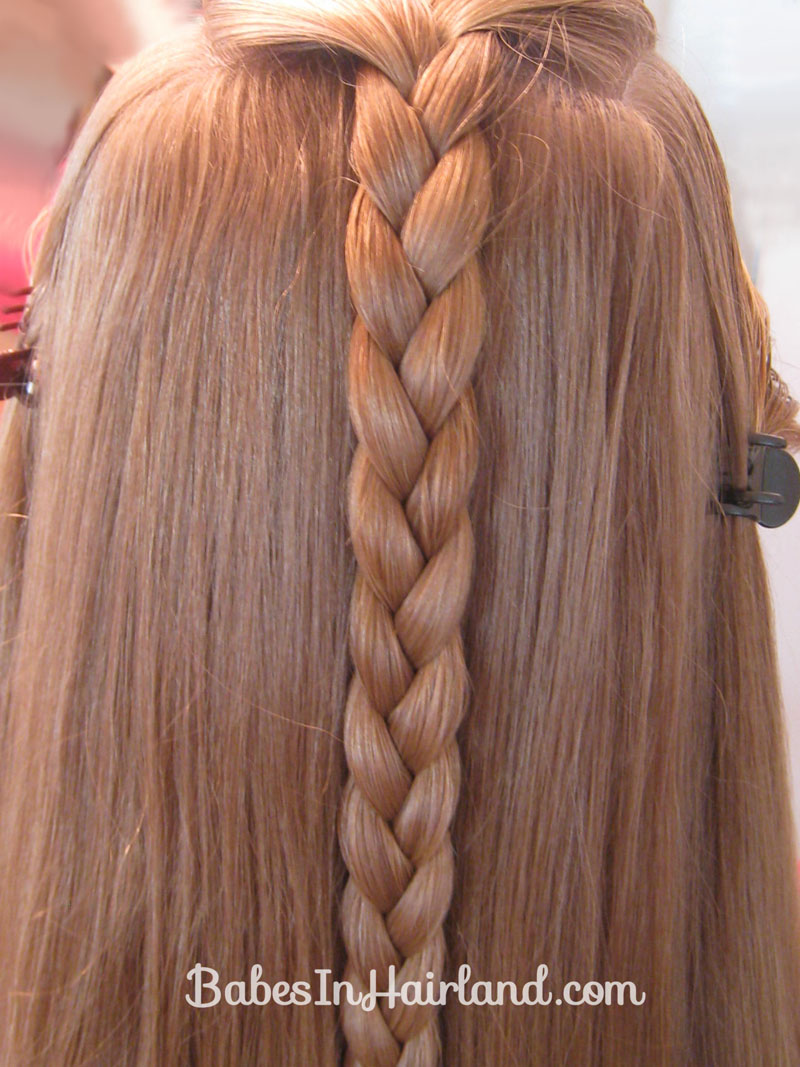
Start with hair. Seriously, this step is crucial. Make a center part down the back of your head and plait each half into a braid of any type, at the back of your head. The link sends you to all of the stand-alone braid tutorials I've made in the past and will in the future. I used fishtails here because they're my favourite and they stay flat to the head.

NOTE: I did these straight down because it was easiest; you might want to braid them sideways for some of these styles.


Style 1: The Double-Wrapped Bun


  1. Take one of your braids and start rolling it from the end in. When it reaches your head, pin it in place. I used twist pins, but regular old bobbies work just as well.
  2. Wrap the other braid around the roll and pin in place, as securely as possible.

Style 2: The Criss-Cross 


  1. Fold the first braid in half underneath itself. Bring it across your head in the direction of the opposite ear, and pin in place.
  2. Fold and pin the other in the same manner, this time across your first braid.
NOTE: I personally dislike this way of doing this style. You might want to fold the braids like this, but position one under the other as opposed to across.

Style 3: The Crown Braid


This one is my absolute favourite of the three. It looks so elegant but in truth takes almost no effort to make.
  1. Wrap one braid under the other and over the top of your head. Pull it tight and pin in place.
  2. Pull the other braid down over the base of the first, and over your head in the opposite direction. Tuck the ends of each braid under the other and pin. Lots and lots of pinning involved here.
That's all for today. As always, leave suggestions for tutorials in the comments or e-mail us at youngfamefashion@gmail.com.

-Scorpio


Wednesday, October 9, 2013

Scorpio's Birthday List

Remember the similar post done by Virgo last year? My birthday's actually not long after hers but I never got the opportunity to make one of my own so here it is for this year. For the blog, this is mostly fashion-related stuff (with a tiny misc section) so it's not my full list. NOTE: I don't expect to get any of this, it's just nice to jot down your wishlist. Try it sometime!

Clothing
  • A new leather jacket, my current one is huge on me and the lining is ripped.
  • These jackets (I found them while looking for good trenchcoat examples and now I'm in love)
  • A puffy vest to wear with long-sleeved shirts in the fall and spring
  • A trenchcoat (à la Columbo or Castiel)/dress-length jacket (jackets are my weakness, I might do a post on them soon)
  • Dark blue and black skinny jeans; the ones I have are fading quickly because I forgot to turn them inside out to wash.
  • Half of the content of Modcloth, mainly these four gorgeous designs
  • This
Makeup
Accessories
  • Black gladiator sandals, the strappier the better.
  • Black leather lace-up boots
  • A small black (seriously, it goes with everything) crossbody bag for dates and nice occasions
  • Craploads of rings and ear cuffs
  • One of these (preferably the first but it costs more). Seriously please.
Other
  • A few psychology books, one or two covering the whole topic for general use and the rest on more specific topics
  • A notebook laptop or convertible tablet, preferably one of these tablets with one of these skins and this bag (seriously even alone the bag would make me so happy).
  • 6 fish, to be named Mercury, John, Wonder, Charles, Joel and Tiersen.
  • Either this or this longboard deck (I broke mine a year and a half ago but never bothered to replace it)

-Scorpio

Friday, October 4, 2013

Braid series 8: How to do a round (3D) braid

The finished product
This takes some time to get the hang of, but the results are worth it. There are two methods. Read their descriptions and see which one is better for you.

Method 1. This is easier to explain but takes some time to get the hang of.

  1. Brush hair and split it into equal sections 1, 2, 3 and 4.
  2. Bring strand 1 under strands 2 and 3, and back around so it rests again between strands 2 and 3.
  3. Bring strand 4 under strand 3 and the former strand 1, and back up and over strand 1 again, so it rests between strands 3 and 1.
  4. Repeat the previous two steps to the end and tie off.
Method 2. This looks tough but is in fact very simple. The explanation may confuse you.

    1. Brush hair and split it into equal sections 1, 2, 3 and 4, from left to right. This is very important.
    2. Take sections 2 and 4 and pull them over strand 3 and to the right, twisting them right as you go. The order should now be 1, 3, 4, 2.
    3. Now twist sections 1 and 3 to the right so the order is now 3, 1, 4, 2.
    4. Rename the sections 1, 2, 3 and 4, accordingly.
    5.  Now take the new strands 1 and 3 and pull them over strand 2 and to the left, twisting them left around each other as you go. The order should now be 3, 1, 2, 4.
    6. Now twist sections 2 and 4 to the left so the order becomes 3, 1, 4, 2.
    7. Rename the sections 1, 2, 3 and 4, accordingly.
    8. Repeat steps 2 to 7 to the end. Remember: The two strands that seem to be below the others are the strands you have to twist over next.
    Enjoy!
    -Scorpio

    Thursday, October 3, 2013

    Braid series 7: How to do a flat four-strand braid

    The finished product
    There are two ways of doing this style, and I'll cover them both here.

    Method 1. This is slightly easier and to be used if you plan on making it French.

    1. Divide hair into four even sections, making sure all of your hair is in one of the bunches. We'll call them, from left to right, strands 1 to 4.
    2. Cross strand 1 over strand 2 and under strand 3.
    3. Cross strand 4 under the former strand 1 and over strand 3.
    4. Continue this, alternating sides and making sure that one side is strictly under-over and the other is strictly over-under, to the end and tie off.
    Method 2. If you want a side French braid, this is best because hair can be added only on one side.

      1. Divide hair into four even sections, making sure all of your hair is in one of the bunches. We'll call them, from left to right, strands 1 to 4.
      2. Cross strand 1 over strand 2, under strand 3 and over strand 4.
      3. Cross strand 2 over strand 3, under strand 4 and over strand 1.
      4. Continue this left-to-right pattern to the end and tie off.
      Enjoy!
      -Scorpio

      Wednesday, October 2, 2013

      Braid series 6: How to do a five-strand braid

      The finished product
      This one looks hard enough but is actually unbelievably easy as long as you have enough fingers. If not, you might manage if you're careful or you can just get someone else to do it for you.

      1. Brush your hair and separate it into five approximately equal-sized sections at the back of your head, keeping each section between your fingers as is comfortable.
      2. Cross the rightmost strand (I always start with right, do what seems easiest) over the second-rightmost and under the middle. Hold all of the strands tightly in this position.
      3. Now cross the leftmost strand over the second-to-left and under the new middle, formerly the right strand.
      4. Repeat steps 2 and 3, keeping the braid tight, to the end and tie off.
      Enjoy!
      -Scorpio

      Tuesday, October 1, 2013

      Braid Series 5: How to do a rope braid

      The finished product
      This braid is not usually used the way it is in the picture, better as an adornment or a method of half-up style, the way I'll be teaching it, but you can do your hair like the picture if you so desire.
      1. Take a section of hair and split it into two pieces. Put the rest of your hair in a ponytail so it doesn't pull and add to the braid. Split the hair in two halves.
      2. Take one half of the section and twist it, turning it over and over until you're at the end of the hair and the whole thing is one tight twist. Pin this down, get someone to hold it, or grip it in your teeth 
      3. Twist the other half in the same direction until it has about the same amount of twist.
      4. Take the other half and hold the two tightly together, making sure they're pointed in the direction you want them to go. Tie them together with an elastic.
      5. Let go and pull on the ends slightly as they twist together to make it more uniform. Make sure to carefully sweep your hand under the braid to remove any stray hairs that might cling onto it as it twists.
      Enjoy!
      -Scorpio

      Monday, September 30, 2013

      Braid Series 4: How to do a fishtail braid

      The finished product
      This is probably my favourite braid overall; it takes some time to make but is rather fun (if that makes sense) and the finished product is beautiful. You can wear just one at the back of your head or make two adorable pigtails over your shoulders. This is only the most basic way to make one; experiment as you please.
      1. Brush your hair and split it in half, pulling a part over each shoulder.
      2. Take a tiny piece from the outside of the right strand and cross it over, adding it to the inside-bottom of the left section.
      3. Holding the left section together, new strand included, take a new small piece from the outside and add it to the inside of the right piece.
      4. Repeat steps 2 and 3 to the end and tie off.
      WARNING! Do not bring the braid over your shoulder to finish too early, and be extremely careful when you do. If you ignore this, the braid will become warped on the opposite side.

      Other than that, enjoy!
      -Scorpio

      Saturday, September 28, 2013

      Braid Series 3: How to do a dutch braid

      The finished product
      My third braid is extremely similar to the French braid; one could even say it's just an upside down version (it is). This is just a quick know-how on how to do this beautiful 3D braid.
      1. Gather three small sections of hair at the top of your hairline and get in position to do a normal braid.
      2. Instead of your usual right-over-middle, left-over-middle routine, cross the right strand under the center and cross the left strand under the new center.
      3. Add a small piece of hair to the new right strand before crossing it under this time, and do the same for the left.
      4. Repeat step 3 until you have no more hair to add, then finish the upside-down braid, pulling it over your shoulder to make it easier when it gets long enough. Remember: you're crossing the strands under, not over.
      5. When you're done, secure with an elastic and wrap a small piece of hair around to hide it.

      Enjoy!

      -Scorpio

      Friday, September 27, 2013

      Braid Series 2: How to do a french braid

      The finished product
      Braid 2 in my series is the classic French braid. It can look a bit daunting but is extremely easy to do if you practice the technique enough.
      1. Gather three small sections of hair at the top of your hairline and start braiding it back with only a couple crossovers, then stop there.
      2. Before crossing the next strand over the middle, add a small section of hair to it and smooth it out, then cross it over the center.
      3. Add another small section of hair to the next strand and cross it over the new middle, keeping the previously crossed strand tight.
      4. Repeat steps 2 and 3, adding another small strand every time you add another section to your braid until you run out of hair.
      5. Once all of your hair has been added to the braid, simply continue braiding down and tie it off at the end.
      Enjoy!

      -Scorpio

      Thursday, September 26, 2013

      Braid series 1: How to do a normal braid

      The finished product
      All right, I know how easy it is to do and how you probably know how to already, but seeing as it's the base for our future braids I'll just go over the steps.
      1. Gather all of your hair into one area at the nape of your neck, or however high you want it to be. You can secure it with a hairtie, but I prefer not to. It's mainly recommended for anyone with lots of layers.
      2. Separate the hair into three sections. I recommend keeping one section between the thumb and index fingers of each hand, and the other lying between the hands.
      3. Cross the rightmost strand over the center one and pull tight, rearranging the three strands back into the original position. The former right strand is now the center strand.
      4. Do the same with the left strand and rearrange the strands again.
      5. Repeat steps 3 and 4 to the end of your hair, and tie the braid off with a hairtie. If you have enough you can pull a small strand of hair out of the tie and wrap it around the elastic, pinning in place.
      Enjoy!

      -Scorpio

      Tuesday, September 24, 2013

      Braid series

      Over the next while I plan on posting a series about different kinds of braids and how to make them, and, more importantly, different hairstyles that can be made out of them. This will be in part to aid in the making of my soon-to-be-made Game of Thrones hair tutorials, and will start with the easiest and go to the hardest. I'll start the moment I can find the time to do so.

      -Scorpio

      Saturday, September 21, 2013

      Mindless Ramblings of Scorpio

      So my sister has a hockey game, my brother has a gig and my parents are out with them, meaning I'm home alone and free to watch one of my new favourite shows: HBO's hit series Game of Thrones, based on George R. R. Martin's A Song of Ice and Fire novels. If you've ever watched it you've probably noticed how absolutely amazing all of the ladies' hair styles are, and if you haven't I'll add some pictures.

      I've decided that, over the next few weeks, I just might grab Virgo and Taurus as models/cameragirls and recreate some of my favourite styles from the series,

      from Arya Stark's braided half-bun
      to Daenerys Targaryen's gorgeous Khaleesi braids
      to Margaery Tyerll's ponytail-type-thing
      to Cersei Lannister's twisted-half-updo (that bitch)
      to Sansa Stark's tournament 'do
      to the braided bun made popular by Melisandre (that witch)

      ...and some other hairstyles such as Catelyn, Ygritte and maybe even a couple of Dothraki men's styles. Are there any others you wish to see from this or anything else? Let me know with a comment.

      -Scorpio

      Saturday, July 27, 2013

      What to wear shopping

      No matter when your birthday is or if you do or don't have a summer job, you probably have some extra money floating around, and want to treat yourself to a shopping trip. But shopping isn't just about what you're buying, it can be about what you're wearing to get the most comvenience out of your trip.

      • Although it may not feel like you're wearing much, sometimes it's best to throw on a plain tank or spaghetti strap top. It's just easier for trying on large sweatshirts, jackets, button-downs and the like. Put a flannel or cardigan over it so you don't look too bare. Plain colours like white and nude are your best options, although if you prefer leopard-print or neon pink zebra stripes, go to town: it's completely up to you.
      • Your second shopping staple is a pair of pants or shorts that can be worn easily when trying on shoes. Leggings  and jeggings are perfect, as well as skinnies that don't go past your ankles. The ideal type does depend on what kind of shoes you're aiming for, but these are pretty much good for anything. Shorts/skirt-wise, you're pretty much good with anything as long as you can imagine them with whatever you plan on buying, so you're co-ordinated while trying on shirts.
      • For the shoes that you do wear shopping, your best bet is anything you can take off easily, whether you're trying on shoes or a new pair of jeans. Sandals, slip-on sneakers, flats (although not great for walking) and Uggs are perfect. I personally have a pair of calf-length leather boots that zip up on the inside and are still snug over slim-legged pants.
      • You have two options for bags: you can either carry a small purse for your wallet and phone and accumulate bags as you go, or simply use a larger crossbody, tote or backpack if you don't plan on buying much.
      • I personally do not recommend wearing a dress if only for the fact that it's much easier to try on separate pieces if you are already wearing separate pieces.
      Thank you for reading, and as always I hope this helps.

      -Scorpio

      Sunday, December 2, 2012

      Fall Colours!

      So now that it's autumn (and almost winter) we thought we'd do a little special on fall and what styles and colours look amazing this time of year.
      Example of a henley
      • Plaid jackets: hooded, preferably with fur or fleece lining. Red, beige, yellow/black mix (like a cute bumblebee), maybe blue and green.
      • Really light or really dark skinny jeans.
      • Knitted or crocheted mittens for the colder days.
      • Leather or suede gloves just to keep away the chill.
      • If you're not a jeans person, try thick leggings or yoga pants, maybe with boots and a long jacket.
      • Plaid doesn't have to be limited to jackets: plaid shirts in all colours look great. Leave them open over a tank top in a neutral colour of your choice.
      • Turtlenecks (or just any long-sleeved shirt) can be worn under a thick or padded vest. Try making the shirt lighter than the vest. If you don't like turtlenecks (seeing as quite a few people don't), the henley is another great option if you want to keep your arms warm!
      Thanks for reading, and I hope this helps you while choosing your fall wardrobe!

      -Scorpio

      Monday, July 16, 2012

      Random posts

      Hey there, sorry to disappoint you but this isn't a fashion post, like most of our others. Sorry again that we haven't been posting much lately, but that's just getting to the point.

      So you know, Virgo and I have been talking about "weekly post series" yet you only hear from us every month or so. I mean, the last post before this was in May! So we're cutting off the "weekly" from these series. This only means that we might be posting about a certain series 8 or 9 times a week (unlikely) or once every 3 months (way more probable).

      Email us about any further issues at youngfamefashion@gmail.com

      -Scorpio

      Saturday, May 12, 2012

      How to wear a dress to school this spring

      You've probably seen girls around your school wearing dresses or skirts. Have you been wondering how they pull it off so casually? Here are some pointers showing you how to rock a dress without looking like you're going off to a wedding.


      • Try flower prints or other fun patterns that draw attention away from the formality of the dress itself and can add a playful look.
      • A wide, stretchy belt can go over it to add a different touch, as well as a skinny belt with a small clasp instead of a buckle.
      • Wear leggings, with or without lace on the hems. A bright colour can take the thought from "Ew, she's wearing a dress to school?" to "Wow, she's really good with colours!", while shades of grey and white are good as well. Fishnets and translucent leggings are a no.
      • I recently lost two bets with my friend and as a result I've had to wear a dress to school twice (something I'd never do normally). The first one was covered in bright streaks of blue and purple and green and yellow, the eye-popping print drawing the eye to me as opposed to the dress itself. The second was more toned down, with a beige, brown and green floral pattern with a bit of pink. I hardly got any notice (just how I like it). It's all a matter of working it.
      • Finally, some quick dont's:
      No floor-length dresses, unless they're plain jersey or light and flowy.
      Nothing too schmancy on the bodice, neckline and sleeves/straps.
      No scarves or other accessories that don't complement the design of the dress.


      -Scorpio

      Monday, April 2, 2012

      Necklaces for your neckline

      You have your round necks, your boatnecks and your v-necks. You can have any neckline you want, but remember: not all necklaces work for all necklines. I know I'm not the one who should be lecturing here; I've been wearing the same old necklace since August. But what I do know is that we haven't posted in AGES, so I might as well put something out there.

      First I'm going to cover round necks. The best necklace type never has a charm or anything else that might pull it down into a V-shape. Round collar, round necklace. Pearls tend to look good depending on the colour of your top, and chokers are all right, especially with a longer necklace to balance it out.

      Boatnecks are good with either a choker or a pendant dropping almost to waist level. A small necklace with a charm is all right in this situation but the main thing to steer clear of is a necklace that randomly goes under the shirt, covering the charm. If the neck is low make the necklace fit an inch or so above the neck of your shirt, or far below it.

      V-necks can look really defined with a charm necklace, especially if it fits the shape of the neck. A layered strand necklace works as well if it isn't too long and if the lengths are just right.

      I hope this helps,

      -Scorpio

      Saturday, September 24, 2011

      Styling tips for your stereotype: Girly

      This is a 7-part series about styling tips for 7 different school stereotypes: goth, sporty, hippie, preppy, earthy, artsy and girly, updated every Tuesday and Saturday. I know there are more than 7 stereotypes, but I'm just covering the basics for now.

      Pink is known as the only colour girly girls wear, but you can honestly use any colour. Pink, purple, red and blue look great but neutral colours are in style. Grey and white are your go-to shades. A pale pink top with grey skinnies is perfect for an average school day. Layer different shades of your colour for an all-around look.
      Styles don't have to be frilly and sparkly, but a couple decorations here and there and around the edges never hurt. Try a low-necked shirt over a tank top or sports bra. Skinnies work well if the shirt has a flared bottom, and short shorts for tighter shirts. Long shirts or short tunics and dresses are good with black or white (depends on the shirt's colour) just-past-knee-length-leggings.
      Use a simple necklace with a charm that goes just to your neckline, a couple of metallic bracelets and maybe one plain ring. Earrings should be drops. Use flats or sandals for your shoes, or in gym class, Converse or white sneakers.
      Use a high ponytail or bun, or out, straightened if you're a brunette and curled for blondes. And as for makeup: there are some girls at my school who put on so much makeup I hardly know their faces. You DON'T have to do this. Simple dark eyeliner and lip gloss, with maybe eyeshadow.
       -Scorpio

      Tuesday, September 20, 2011

      Styling tips for your stereotype: Artsy

      This is a 7-part series about styling tips for 7 different school stereotypes: goth, sporty, hippie, preppy, earthy, artsy and girly, updated every Tuesday and Saturday. I know there are more than 7 stereotypes, but I'm just covering the basics for now.

      Artsy is most well known as having paint stains all over your ratty canvas pants and loose white shirt, as well as any inch of skin showing. Trust me, this isn't going to impress anyone unless you're your own art project. I'm not going to spend too much time on colours because you can use any colour you want. Colours you SHOULD avoid, however, are neutral, toned-down shades that could be brighter, and anything short of a yellow in the brown range. Try not to use shades except for white.
      The designs are almost always outgoing and loud in some way. An extremely baggy sweatshirt with the bottom and most of the arms cut off over a vibrant tank and denim shorts always makes a statement, as do plain shirts with a loud pattern or design. Baggy tops and snug bottoms are classic artsy, while you should try to avoid sweatpants or tupe tops. Try ripped jean cutoffs or slightly cuffed up skinnies. Denim is a must, whether it's pants or shorts or a skirt.
      Use simple yet noticeable jewelery. A plain choker is good, as well as a long necklace (pearls or small beads) looped at least twice around your neck. Avoid headbands or other hair ornaments. Try simple band bracelets as well as wide belts and boots or sneakers (Converse is a good brand). For warmer weather wear sandals.
      Artsy is the best stereotype if you want a range of good hairstyles. Putting your hair up is a classic artsy look. Cheap tip for a good style: Wash your hair, then half-dry it, brush it, pull it back and put a headband on to keep it like that. Then do one or two braids and wait a while (an hour to a night), then take off the headband and shake out your hair. Some strands will come loose but that's okay. Leave the braids in. You can brush the top of your hair up to the elastic(s) for a neater look, or not. It's honestly your choice. If you don't want to do this, do a high or low ponytail or low braid. A bun is good to get your hair off your neck in the summer. Or you can let it out, drawing a lock from the front of each side to the back and tie them together like that. You can also braid the locks before you tie them. Use some eyeshadow in a deep colour, and dark red lip gloss for a good touch.
      -Scorpio

      Saturday, September 17, 2011

      Styling tips for your stereotype: Earthy

      This is a 7-part series about styling tips for 7 different school stereotypes: goth, sporty, hippie, preppy, earthy, artsy and girly, updated every Tuesday and Saturday. I know there are more than 7 stereotypes, but I'm just covering the basics for now.

      When some people think of the word earthy, they think of, well, earth. Not the planet but the dirt. But no worries, you won't have to cover yourself in huge globs of mud, just the colours. Firstly, you don't even have to use all browns and blacks, just build your outfit around those colours. Try different shades of green (there are a lot), or toned-down yellows and beiges with some grey and white thrown into the mix for added look, maybe for a tank top under a too-loose shirt. Try a dark bottom with a mixed colour top. Green is good as one colour, but what about the contrasts? Yellow works, as long as it isn't bright. Brown is good to tone it down and beige is okay for the natural look. And finally if you want to capture the largest part of the earth, use oceany colours such as blue and turquoise. The overall main thing to do: avoid rich colours.
      For shirts, try layering. Put a tank top under a baggy shirt under a sweater. Scoop necks are good for this style, as are panels and cropped tops (as long as you have something under them. I don't think your teachers will be very happy otherwise). Try a long, flare-bottomed top over optionally ripped jeans. For shorts you can use frayed jean shorts, or loose shorts made from a light fabric. Skirts should be solid coloured and flowing, and yoga pants are good as well as jeans. Dresses are good if they're loose but cinched with a belt at or below the waist. For sweaters use a plain zip-up in an earthy tone.
      Accessories should emphasize everything: your colours, your wrists, your neck and neckline. The stereotypical earthy girl is slender but no one has to be. Try a plain string necklace with a large wooden charm or a patterned choker. Use wide, wood or leather bracelets with designs such as beads and paints. Anklets are good as well, maybe woven or anything else made with embroidery floss. Belts are good, brown or black over a lighter shirt or dress. Headbands are good in solid colours or tribal patterns. Shoes can be flats, plain sandals or gladiators. Also possible are boots with buckles at the sides or rims at the top.
      Hair is good teased and let out or in a simple ponytail or braid. Avoid straightening or curling, but any updo looks great. Buns, high or low ponytails and braids, pigtails, side-ties. Use a headband only if it contrasts your hair yet emphasizes your colours. Use some earthy green eyeliner and dark mascara, as well as the optional brown or green eyeshadow. Try a skin tone lip colour, or a deep red.


      -Scorpio